1. Cheating records summary table
2. Save the cheating records summary table as XML spreadsheet for MS Excel
Using the CHEATTRACK system is very straightforward and most people won't require any guidance. However, we have prepared the following User Guide in case it is useful.
This page assumes you have access to a working copy of CHEATTRACK. If you haven't done that you need to download a copy of CHEATTRACK and follow the installation guide before you continue with this page.
You can click on any image in this page to get a larger version of it.
Please select one of the following four tabs:
| Guideline |
| 1. | Cheating records summary table |
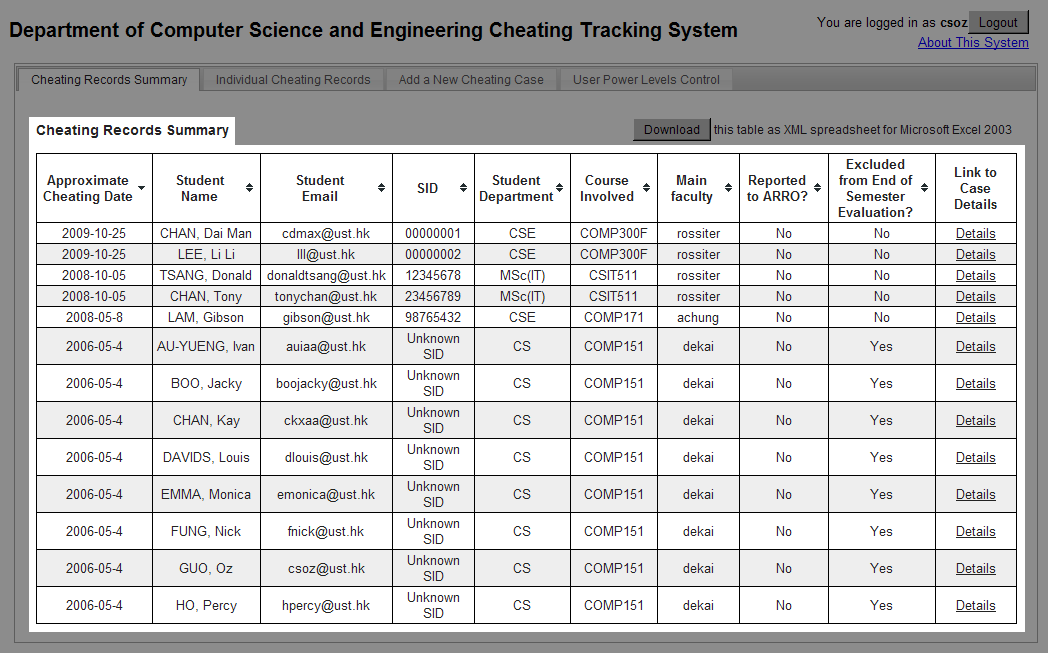
Figure 1 - The cheating records summary table
| 2. | Save the cheating records summary table as XML spreadsheet for MS Excel |

Figure 2 - Saving the summary table as XML spreadsheet for MS Excel
| Guideline |
| 1. | Individual cheating records |
| 1.1. | User without special responsibilities |
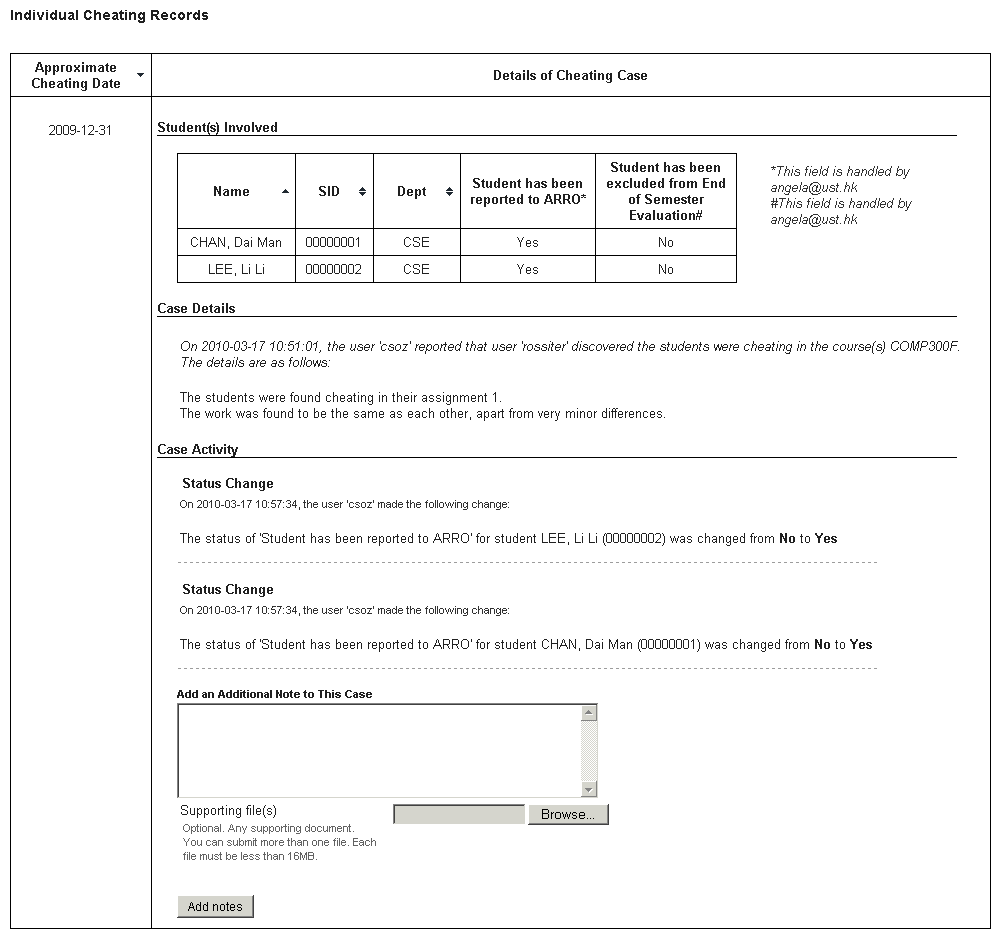
Figure 1 - Screen dump showing the user interface of individual cheating records for a user without special responsibilities
| 1.2. | User with special responsibilities (including administrator) |
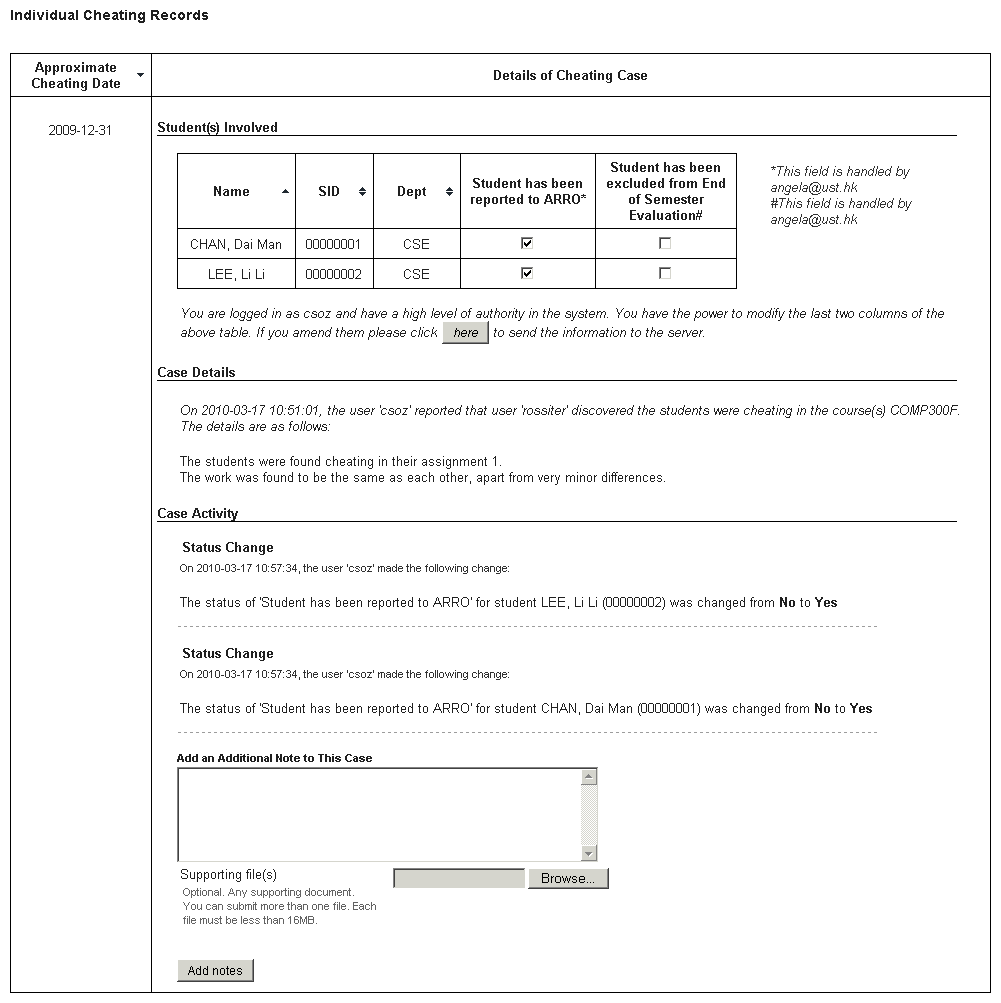
Figure 2 - Screen dump showing the user interface of individual cheating records a the user with special responsibilities (including administrator)
| 2. | Add an additional note |
If you want, you can add an additional note to an existing cheating case. You need to fill in the details and then click the 'Add notes' button to add the note to the case in the database. Optionally you can add any supporting file(s) to the note.
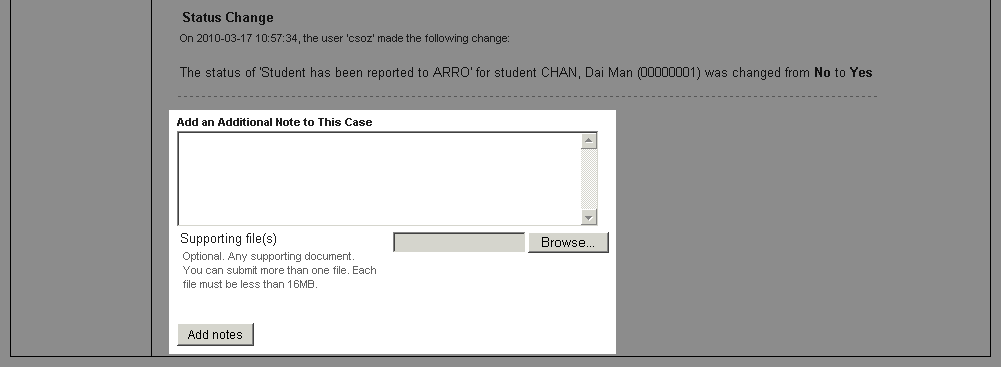
Figure 3 - Screen dump showing the addition of a note to a case
| 3. | If you have the responsibility (or you are administrator), you can update the status of the two tick boxes for the case |
You may modify the status of reporting of the student(s) individually. Click the 'here' button to apply the changes to the database.
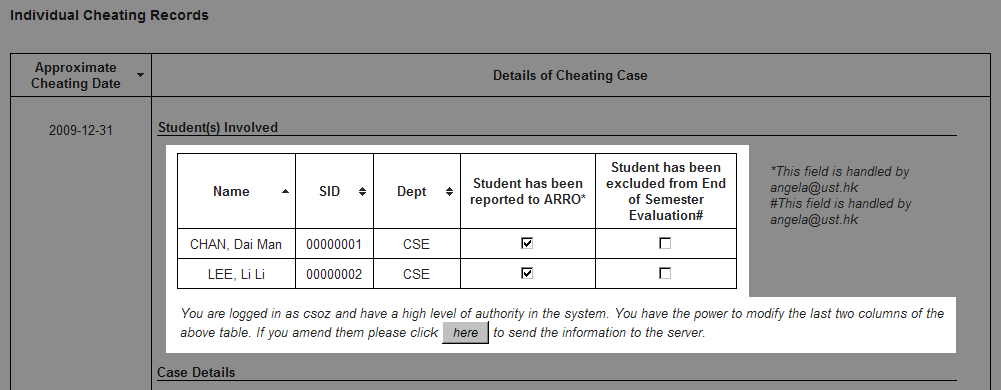
Figure 4 - Screen dump showing the ability to change the two tick boxes, for a user with appropriate responsibility (or an administrator)
| Guideline |
| 1. | Add a new cheating case |
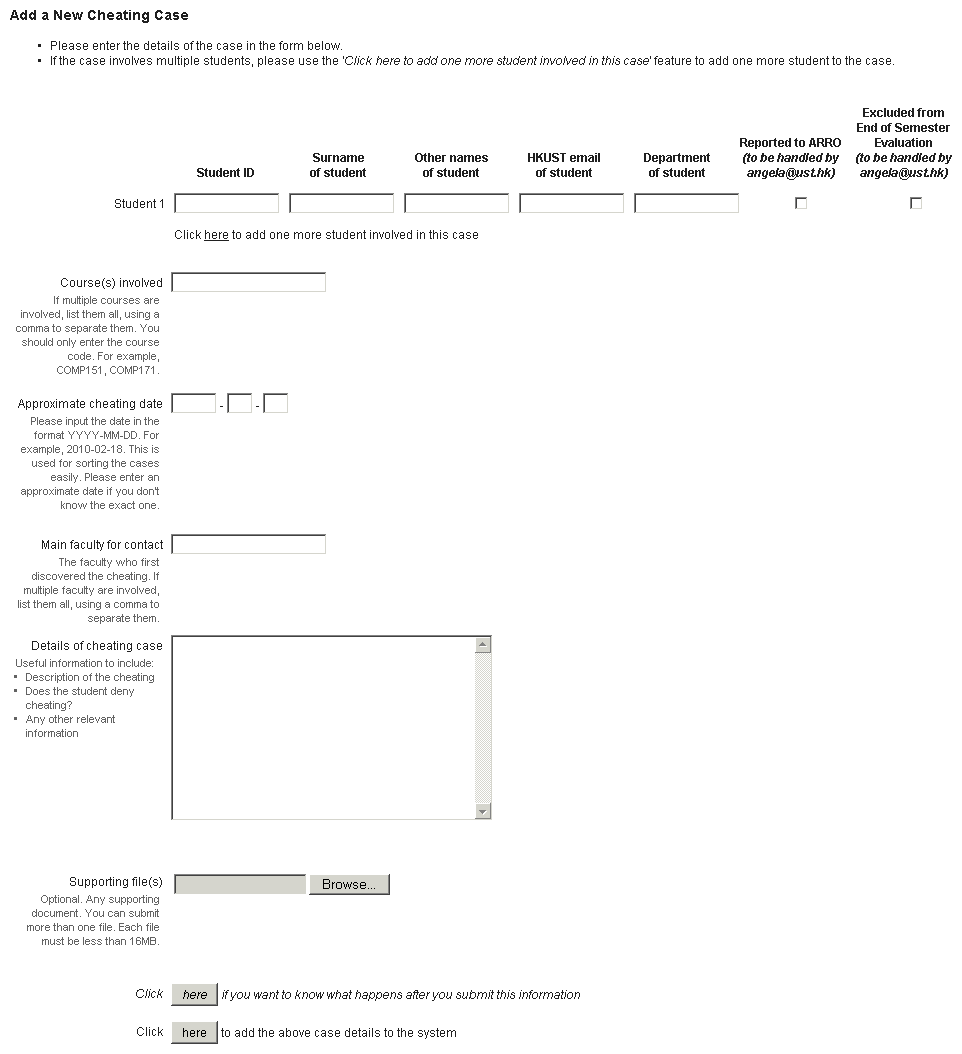
Figure 1 - Screen dump showing the user interface used to add a new cheating case
| 1.1. | Enter the details of the new case |
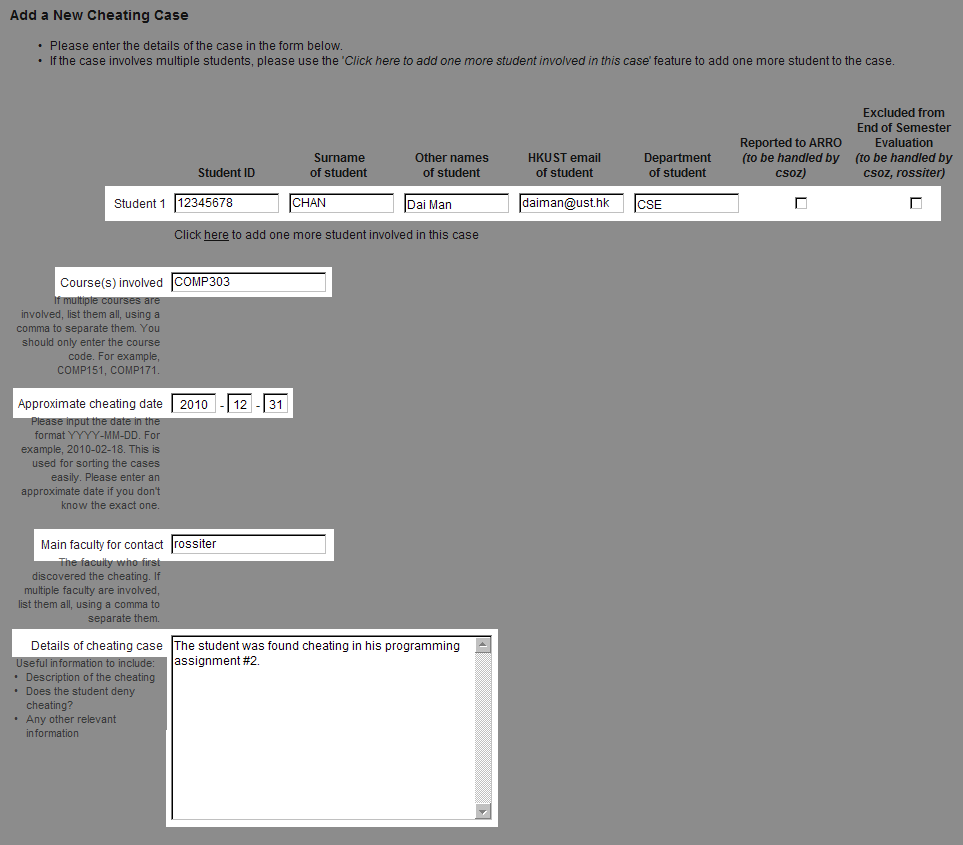
Figure 2 - Enter the details of a new cheating case
| 1.1.1. | Add more student(s) to the case |
If more than one student is involved in the cheating case, you can add more student(s) by clicking 'here'.
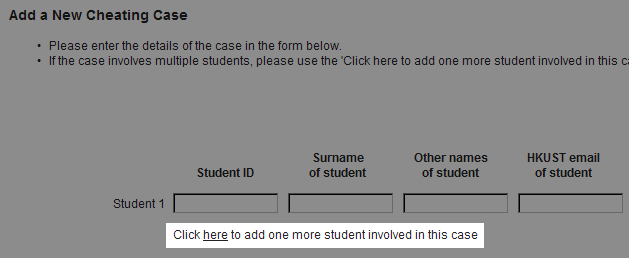
Figure 3 - Adding more student(s) to the case
| 1.2. | Uploading supporting file(s) |
You can attach supporting files to the case.

Figure 4 - Adding supporting documents to the case
| 1.3. | What happens after you submit this information |
If you want, you can view "What Happens After You Submit This Information".

Figure 5 - Select this button to show the "What Happens After You Submit This Information" display
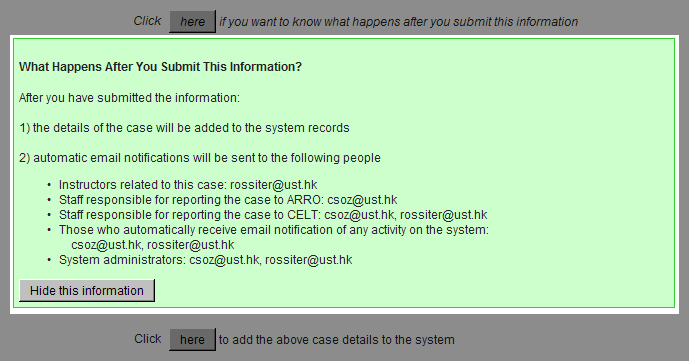
Figure 6 - The "What Happens After You Submit This Information" information dialog
| 1.4. | Submit the case to the system |
Click the button shown below to add the case to the database

Figure 7 - Adding the case to the system
| Guideline |
1. Change user(s) power level and assign responsibilities for user(s)
1.1. Select user power level and optionally assign a responsibility
1.2. Update the changes to the database
3. Add new user(s)
3.1. Enter the new user(s) account
3.2. Choose the default power level for the new user(s)
3.3. Update the new user(s) to the database
| User power level key |

Figure 1 - Screen dump showing the user power levels and what they mean. You may find this image useful for reference.
| 1. | Change user(s) power level and assign responsibilities for user(s) |

Figure 2 - Screen dump showing the user interface used to change the users power levels
| 1.1. | Select suitable power level for the users and optionally assign responsibilities to the users |
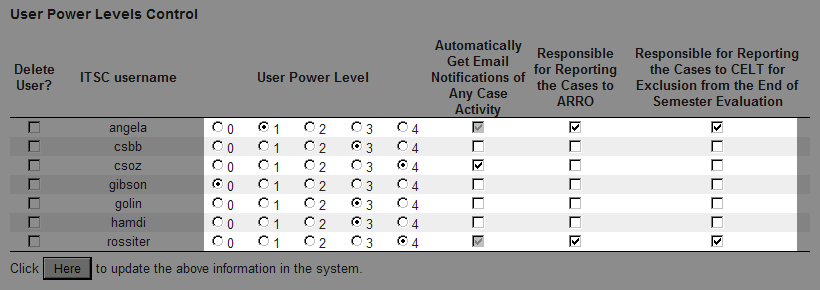
Figure 3 - Selecting the user power level and assigning responsibilities for the users
| 1.2. | After selecting the power level and assigning responsibilities for the users, you need to click the 'here' button to update the database. |
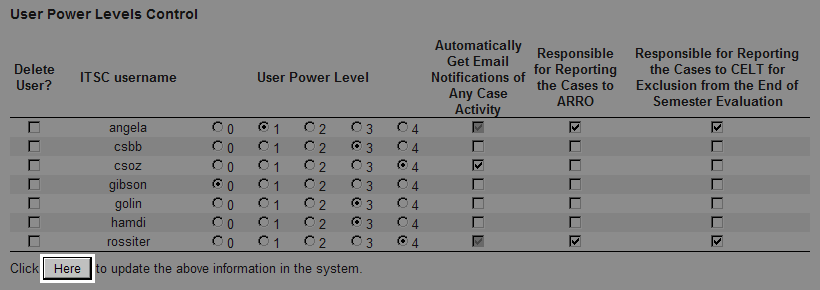
Figure 4 - Update the database with the changes made to the power level of the users
| 2. | If you want to, you can tick the 'Delete User?' box to delete the chosen user(s) and click the 'here' button to update the database. However, you can simply change his/her power level to '0' to achieve the same result without completely removing the account from the system. |

Figure 5 - Deleting the chosen user
| 3. | Add new user(s) |
| 3.1. | Enter the user account(s) in the text box. If you want to add more than one user, use a comma to separate them i.e. peter, david, john. |
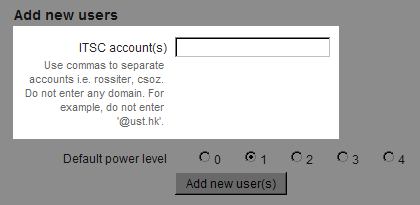
Figure 6 - Entering the new user(s) account
| 3.2. | Choose the default power level for the new user(s) |
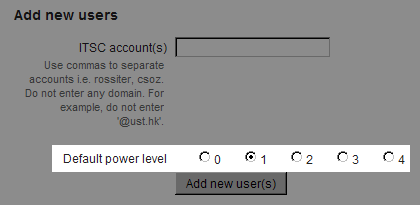
Figure 7 - Choosing the default power level of the new user(s)
| 3.3. | Click the button shown below to add the new user(s) to the database |
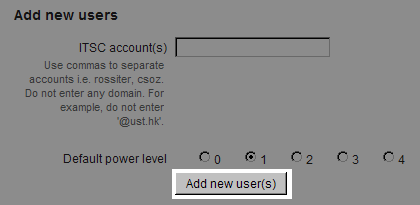
Figure 8 - Applying the add user(s) request