Installation Guide

This software was originally created at HKUST to help departments in the University track the cheating cases of students, and to easily share the information amongst members of the department. Consequentially, the following installation instructions assume you are installing the software for use at HKUST, but there is some advice on what to do to get it working in another institutions.

You can click on any image in this page to get a larger version of it.


1. Download the source code

Download the latest version of the CHEATTRACK source code from the download page.


2. Install web server and PHP
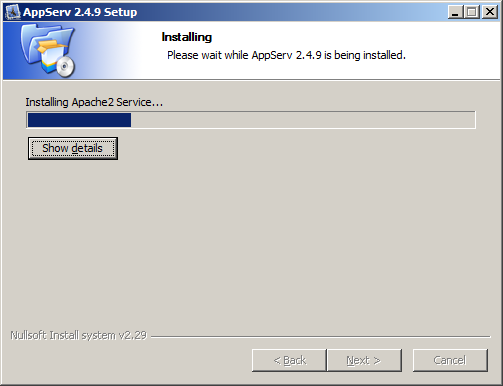
2.1. Installation

Install a web server and PHP (must be version 4.x) and make sure that it works correctly on your system.

The PHP version MUST be 4.X. You cannot use a more recent version of PHP due to the different XML library between versions 4.X and 5.X.

You are recommended to use the AppServ installation package (you are not required to install MySQL server when you are asked to select the components during the installation of AppServ).

The following installation instructions assume you are using the AppServ installation package to install the Apache web server and PHP. If you are using a different way to install Apache and PHP then the steps may be different. For example, the location of some of the files mentioned in this page may be different.

Figure 1 - Installation of AppServ


After the installation has completed, access

http://<your hostname>/
to check if the server is set up correctly. A page similar to figure 2 should be seen.

Figure 2 - Screen shot of a successfully installed AppServ default home page

2.2. Configuration
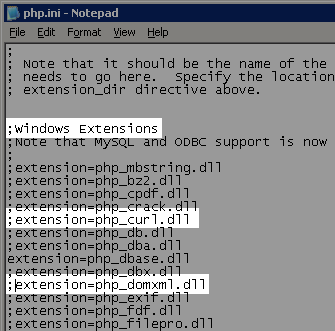
2.2.1. Check the required libraries

If you are NOT using the AppServ installation package, extract the PHP library files called php_domxml.dll and php_curl.dll from the source code zip file to the extensions directory of your PHP (e.g. C:\PHP\extensions).

If you are using the AppServ installation package, then the PHP library files mentioned above should be already included in the extensions directory of your PHP.

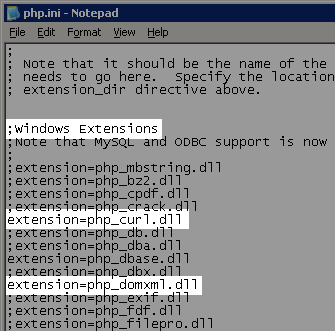
2.2.2. Enable the library in PHP

Please locate the file called php.ini in your system and open it with a text editor (e.g. notepad). Then search for the words Windows Extensions.

Figure 3 - Find the words 'Windows Extensions'

Uncomment the following lines by removing the ' ; ' at the beginning of the line.

extension=php_curl.dll
extension=php_domxml.dll

Figure 4 - What the file looks after the modifications

Search for the words SMTP and change the SMTP server to yours. If you are installing the system for use at HKUST, set it to smtp.ust.hk.

smtp.ust.hk can only be used in HKUST. If you are using the software in a different institution, a different SMTP server should be used.

Figure 5 - Find and set the SMTP server

Save and close the file.

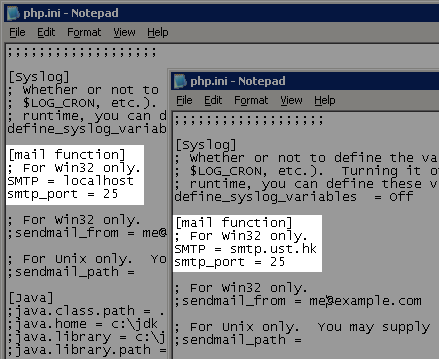
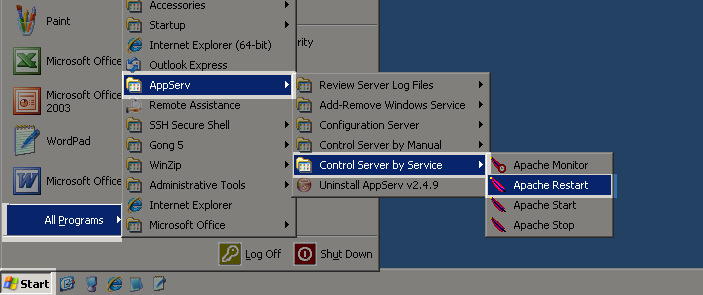
2.2.3. Restarting the Apache server

A restart of the server is needed after changing php.ini.

That can be done by selecting

Start > All Programs > AppServ > Control Server by Service > Apache Restart

Figure 6 - Restart the Apache server from the Start menu


3. Install the CHEATTRACK system
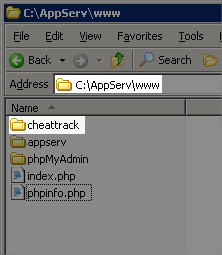
3.1. Locate your document root directory

If you are using AppServ, the document root directory is

C:\AppServ\www\<sub-directory>
by default.


If you are using Apache 1.3.x, the document root directory is

C:\Program Files\Apache Group\Apache\htdocs\<sub-directory>
by default.


For Apache 2.0.x users, the document root directory is

C:\Program Files\Apache Group\Apache2\htdocs\<sub-directory>
by default.

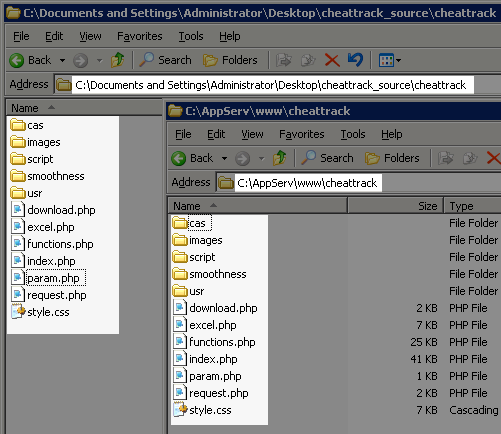
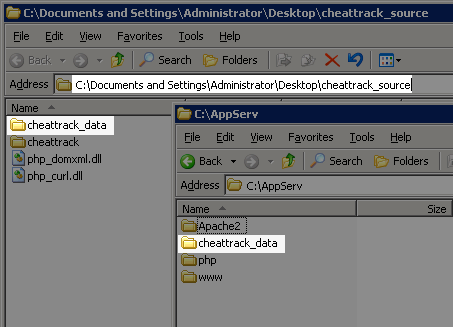
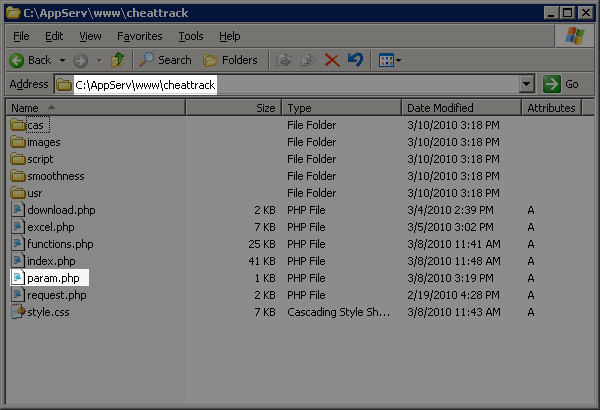
3.2. Copying the files

Create a sub-directory in your document root directory as the root directory for your CHEATTRACK system.

In the following example, the cheattrack directory inside C:\AppServ\www will be the root directory of the system.

Figure 7 - Creating the root directory of CHEATTRACK


Extract the files from the source code zip file. You should see two folders as shown in figure 8. Please do not change the file structures inside these two folders, otherwise the system may not work properly.

Figure 8 - Extracted content of the source code zip file


Copy the files inside the folder cheattrack into the root directory of the CHEATTRACK system that you just created (e.g. C:\AppServ\www\cheattrack\).

Figure 9 - Content in outcome_mapping is copied to the CHEATTRACK root directory


Copy the folder cheattrack_data to a location that is not publicly accessible by others (e.g. C:\AppServ, the installation directory of AppServ).

Figure 10 - An illustration of copying the cheattrack_data directory

3.3. Configuring the CHEATTRACK system
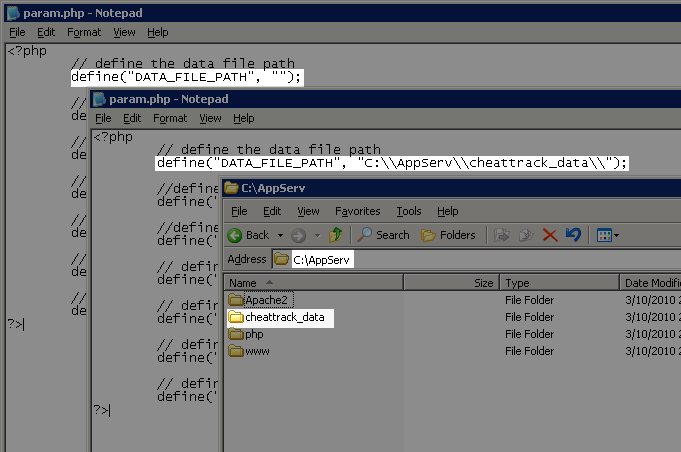
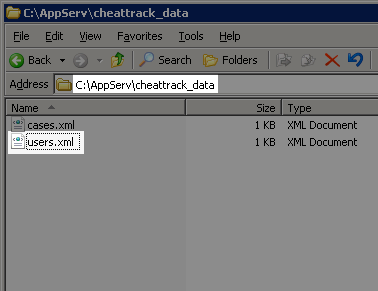
3.3.1. Setting the parameter file

Open the file param.php in the root directory (e.g. C:\AppServ\www\cheattrack\) of CHEATTRACK (introduced in step 3.2) with a text editor.

Figure 11 - Open the file param.php


Set the DATA_FILE_PATH to the location where you put the cheattrack_data folder (in step 3.2). Remember to use two backslashes (\\) instead of only one (\) in the setting file. A backslash (i.e. \\) is needed at the end of the path.

Figure 12 - An illustration of setting the DATA_FILE_PATH to the full path of the outcome_mapping_data directory


Save and close the file.

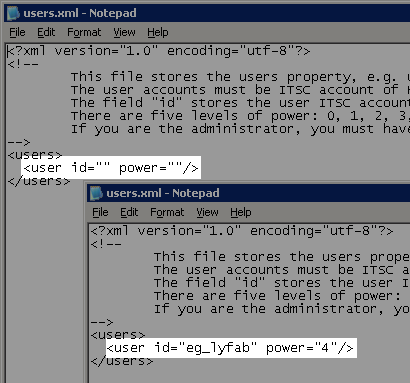
3.3.2. Add the administrator account manually

Open the users.xml in the cheattrack_data folder (e.g. C:\AppServ\cheattrack_data\users.xml) with a text editor.

Figure 13 - Open the file users.xml


The field id must be set to your ITSC account (e.g. eg_lyfab). The field power must be set to 4 if you are the administrator of the system. You should have at least one person who has administrator power (=level 4 power).

The 'ITSC account' refers to the intranet accounts used at the institution where we created the CHEATTRACK system, which is HKUST. If you are using the software in a different institution, you should use the user account authentication system which is appropriate to your institution.

Figure 14 - Add your ITSC account and set the power to 4


Save and close the file.


4. Start the system

At this stage you have completed the installation and configuration of the system. Now you can get started by accessing

http://<your hostname>/<sub-directory>/
(e.g. http://localhost/cheattrack/ in the example)

If you are using the system at UST, you will need to use your ITSC account to login to the system.

This image illustrates the login page for HKUST. If you are using the software in a different institution, your login page will look different.

Figure 15 - Example login screen for HKUST

After successfully logging on, you should see the main CHEATTRACK interface as shown in the figure below.

Figure 16 - The CHEATTRACK first page


You can now proceed to add new cheating case records. Although this is very straightforward and should not require any guidance, we have described some basic steps in the user guide here.