Annotation Tool
To help expand the dataset to more actions and classes, we have developed a simple interactive annotation tool that supports faster user labeling. The annotation tool provides the end-to-end creation of accurate 3D skeletons from 2D images. This page will show the main functionalities of the annotation tool and how to set it up so that we can easily create more distinct action classes through crowdsourcing.
Get Started
- Follow the setup instruction in here to install the annotation tool.
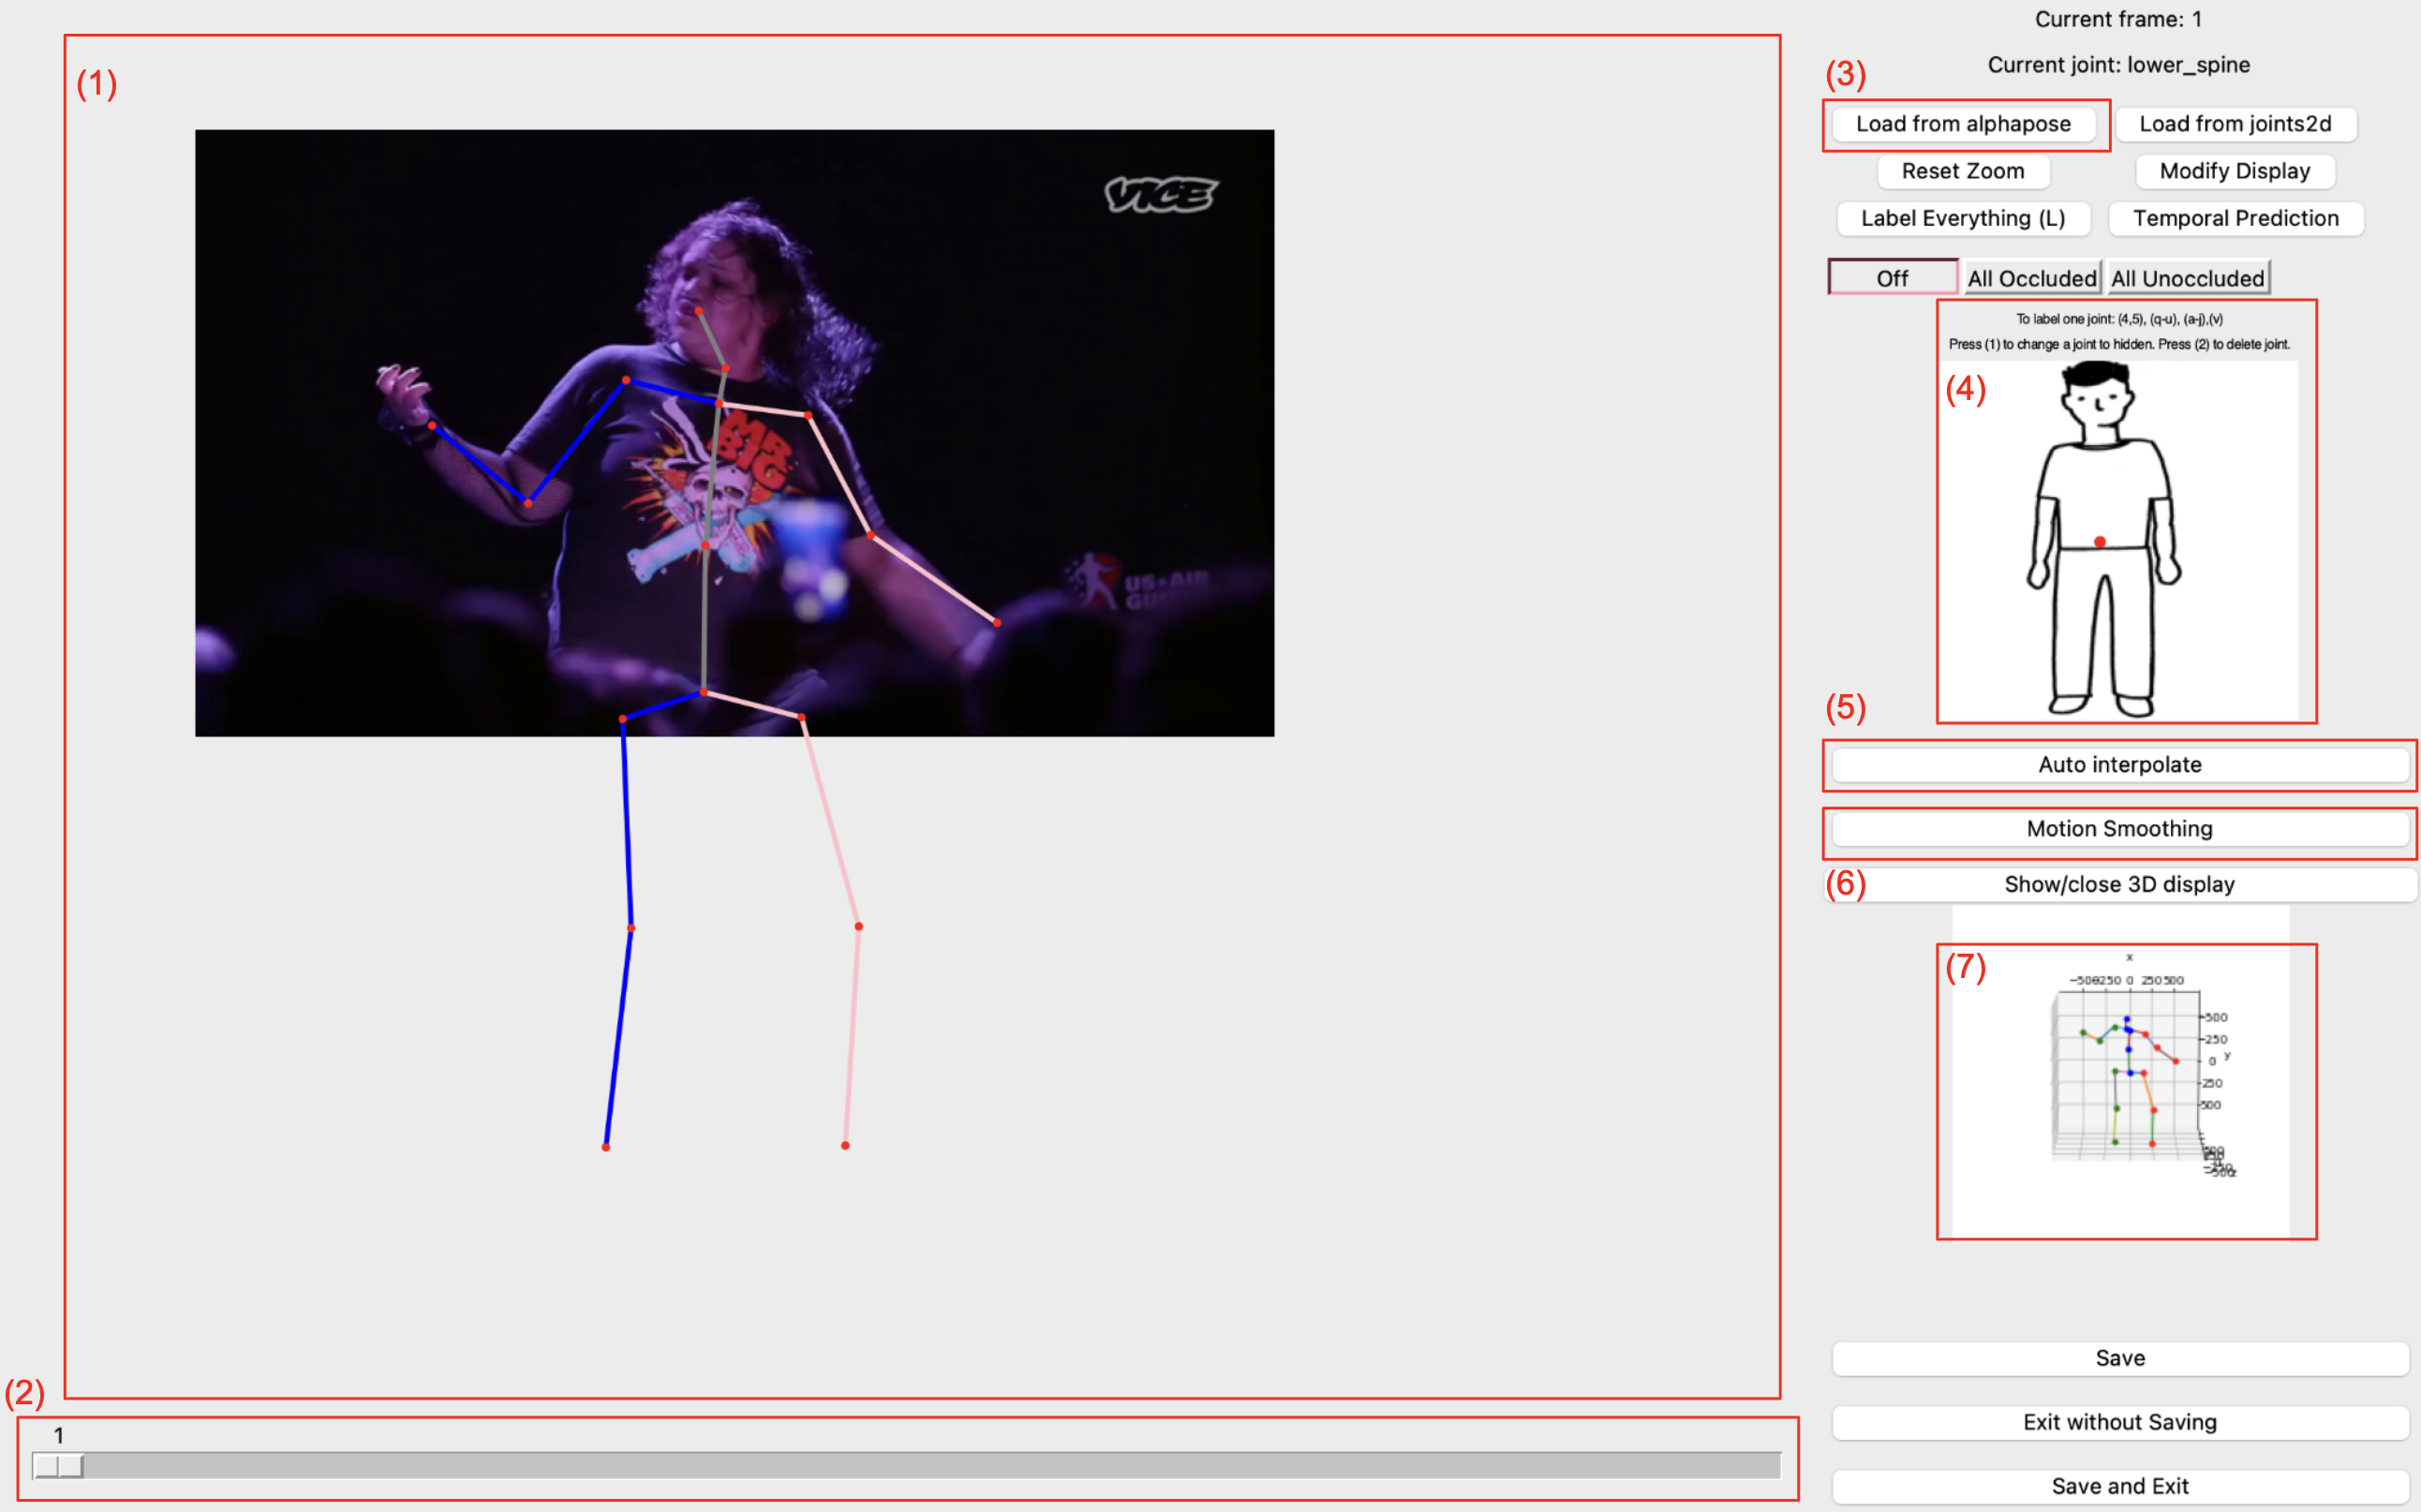
- In the annotating page, (1) shows the annotating canvas. Users can use mouse scroll and drag to move the frame into the wanted position. Click [Reset Zoom] button on the right to go back to the default.
- To change the frame, use the bar below (2), or press (z) or (x) on your keyboard to go to the prev/next frame. Scroll the bar quickly for a video-like preview.
- Users can press (3) to load preliminary prediction of the joints from Alphapose. The predicted skeleton will be processed to Evoskeleton format. If the alphapose information doesn't exist, it will run the AlphaPose network to generate the info file (make sure that your device has cuda).
- To label, you can press [L] on your keyboard to start labeling 17 joints. You can also use your keyboard to label a single joint. keys are [4],[5],[q-u], [a-j],[v]. You can use the image on the right (4) for the guide.
- The tool supports the linear interpolation method by click (5). Users can simply select the two frames the way, and the tool will perform interpolation for the joints' position in the intermediate frame.
- Users can monitor the generated 3D joints' position in (7) real-time and correct the corresponding 2D position to increase the accuracy.
- More information can also be found in here.

Demo
Here we also provide a demo video for using the annotation tool.
Further Improvements
- Working on the release a web version annotation tool so that users don't need to setup locally.
- Introduce a better interpolation model.


